


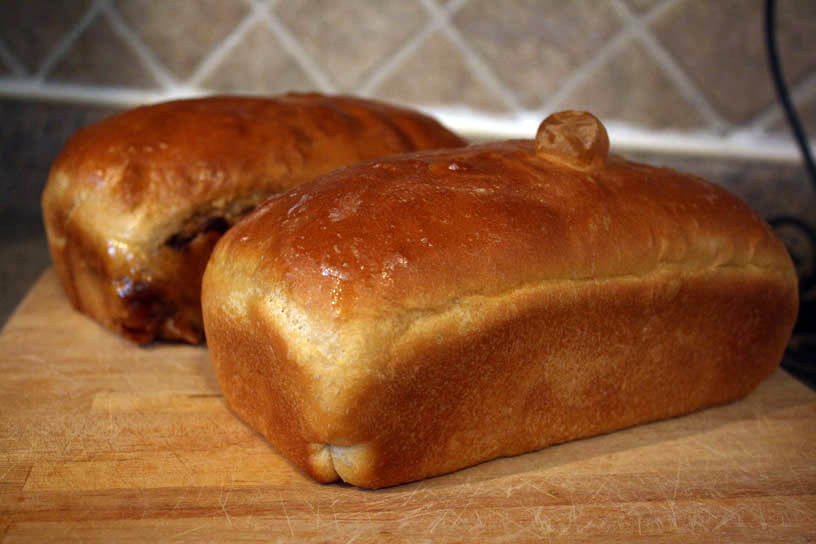
Remember that delicious loaf of whole wheat bread I made a few weeks back? The one with the HUGE hole running through? The hole certainly didn’t affect the taste, but besides being an eyesore, it caused peanut butter and jelly’s to become a sticky mess oozing from the bread. And really, that’s just not acceptable.
But a lesson from baking experts at King Arthur Flour revealed a better way to shape a loaf of bread, eliminating unsightly holes and encouraging a higher rise. The demonstration was a stop on the company’s fall tour across the country; the closest to Fredericksburg was in Fairfax. The drive up I-95 proved to be longer than hoped (doesn’t it always on Saturdays though?), but at least I didn’t have to drive to Vermont. I was glad to have the chance to be among 150 or so other bakers learning tips to bake a better loaf of whole wheat bread from folks who really know their stuff.
Aside from the tip to soak whole grains, the “head and shoulders” shaping method was perhaps the most valuable take-away Saturday. How I put a piece of dough into a pan has never been much of a concern–I thought I could either fold it in thirds or roll it, and it’d work just fine. But a tighter roll yields better results, our teacher, Bonnie, told us. And I had already seen firsthand that my careless method didn’t work.

Using a video camera pointed at her workspace and a video projected on the screen at the Marriott Fairfax, Bonnie worked her way through the recipe for Walter Sands’ Basic White Bread, using some white whole wheat flour. She explained the role of each ingredient (see below for more details) and ways to improve your bread-making techniques. Our teacher was obviously passionate about the topic, something that’s clear from King Arthur employees in their informative, fun and delicious blog posts. “This is a little different way of shaping the bread,” she told us about the “head and shoulders” method. “It’s fun to try new things.”

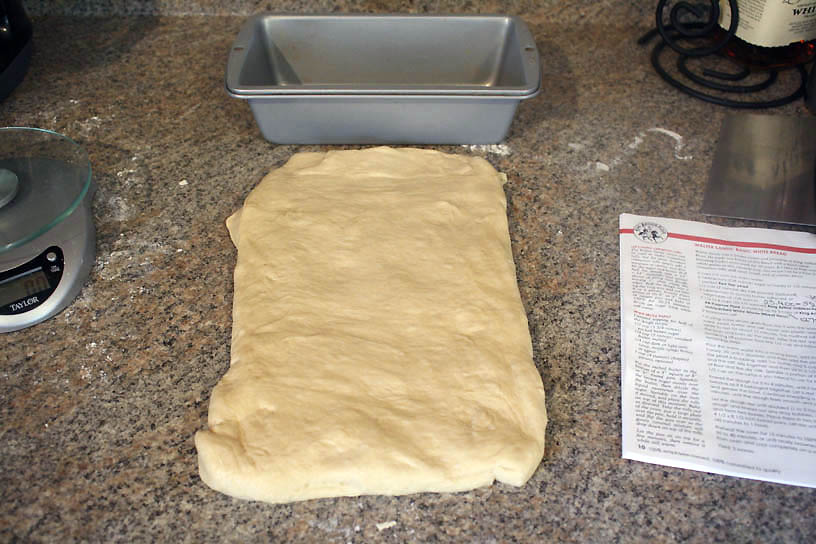
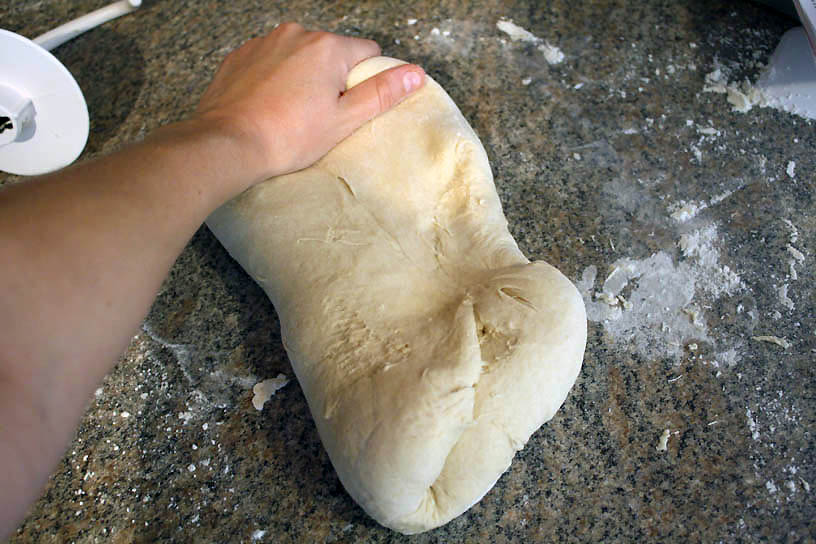
Here’s how to shape bread using the “head and shoulders” method:
First, shape the dough into a long rectangle.
Pick up the two far corners and pull out slightly–these are the “shoulders.”
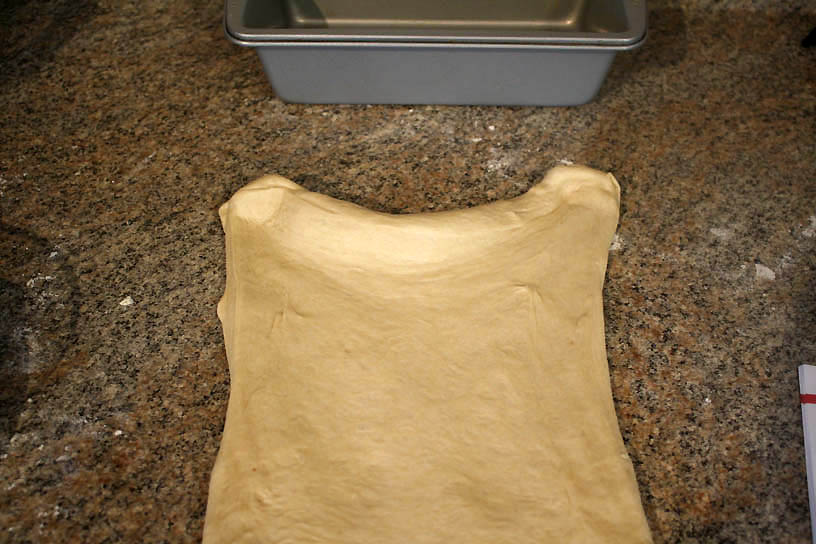
Fold the shoulders down.
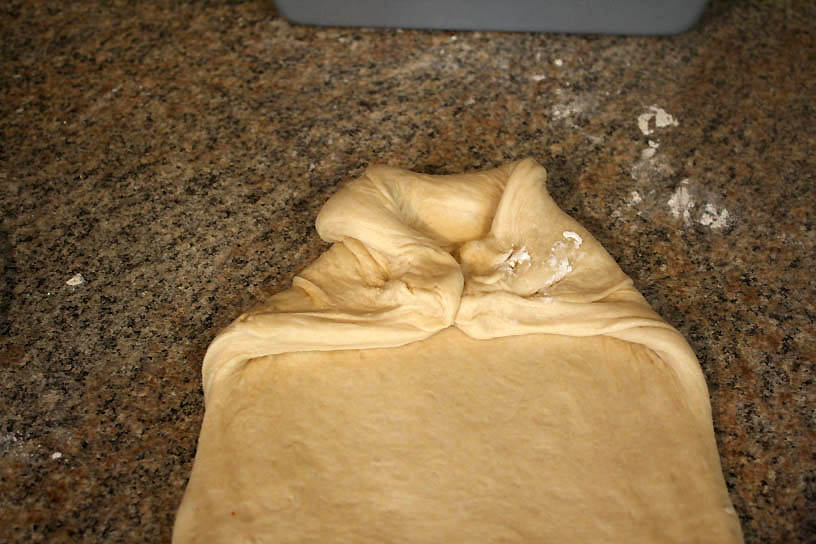
Pull the middle up–this is the “head.”
Fold the “head” over the edges of the “shoulders” so there’s a bump. Press down so all the air is out.


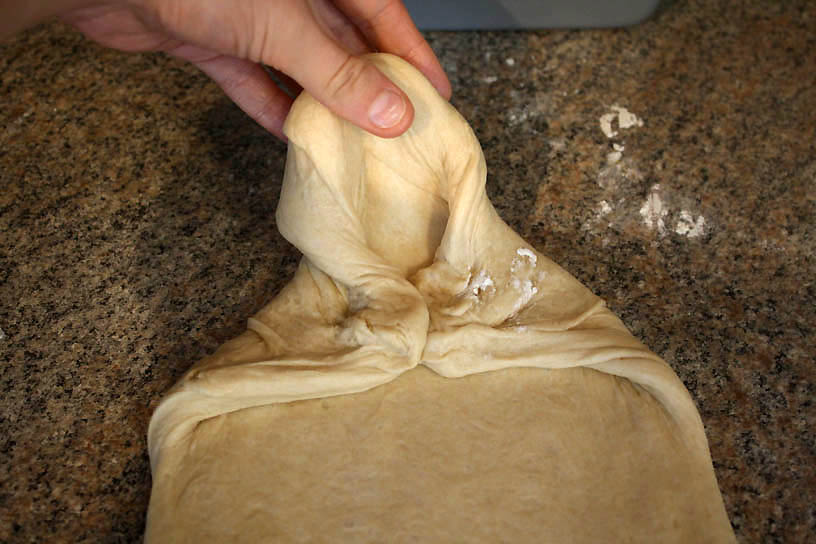
Now you’re going to pick up two more shoulders, and create another head. Fold down, and tightly press.
Continue down the length of the dough, rolling as you go to squeeze out air.


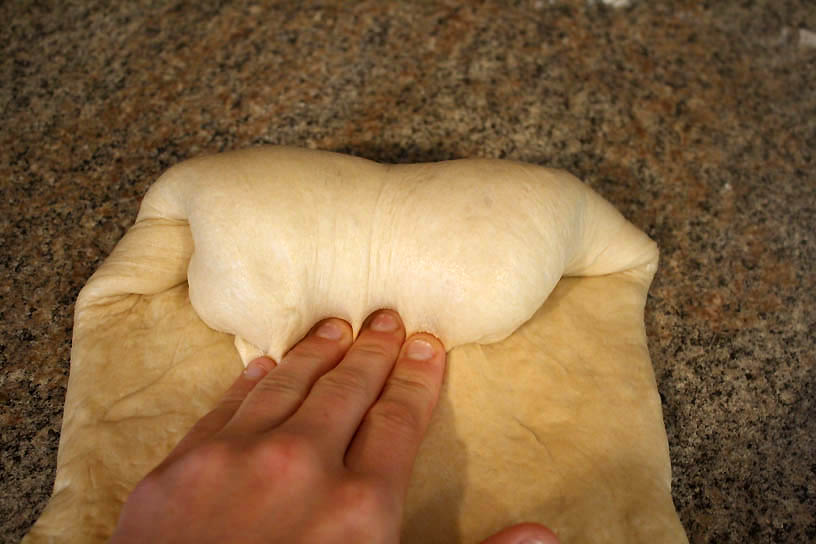
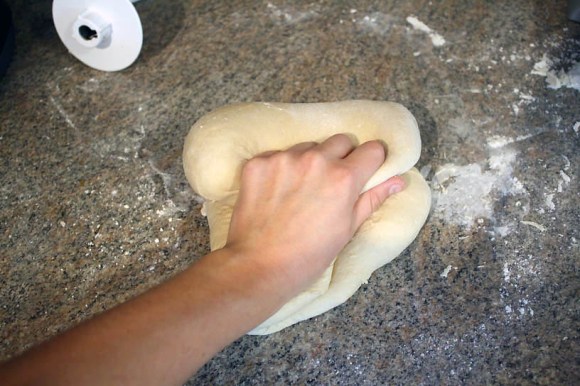
At the end, pinch the seam together and rock back and forth to reinforce. You don’t want any steam to escape here–causing a split in the loaf.

At this point, you’ll place the loaf into a lightly greased 8½ x 4½ pan, let it rise, bake and enjoy hole-free bread. I hoped to find a blog post from King Arthur Flour about this process but wasn’t able to. Hopefully this technique makes sense; the company’s hotline at 802/649-3717 could be helpful as well.
During the 1½ hour presentation, Bonnie shared other tips for baking bread and using King Arthur Flour’s products:
The flour: White whole wheat flour comes from white wheat berries, while the company’s darker whole wheat flour is from red wheat berries. Nothing has been removed from the wheat berry, Bonnie said, and the bran and germ remain in the flour, meaning it has good-for-you fiber. The white whole wheat flour has a milder taste, and may be good for those who aren’t used to the flavor and texture of whole wheat products. The other whole wheat flour has a stronger, nutty flavor that some people may find bitter. (Orange juice can help cut that down.)
Soak whole wheat flours in water for a better loaf. The bran particles in flour are sharp and cut the gluten strands that you’re trying to form when you’re kneading dough. That’s what makes whole wheat bread denser than a loaf of white bread, I learned. Soaking softens the particles and can also increase flavor. Using half whole wheat flour and half all-purpose flour in a recipe can yield a higher rise with a lighter loaf–King Arthur Flour recommends soaking the whole wheat, then adding the white flour later in the recipe. This is the other technique I’ll be experimenting with as I make more bread this fall.

Use a kitchen scale for the most accurate measure of ingredients. One cup of flour should weight 4 oz. to 4 1/2 oz. But if you prefer to use a measuring cup, try this method: fluff the flour in the container, sprinkle it over the cup til it overflows, then level off. If you fill the cup up, tap it down and fill it more, you could have up to 6 oz. of flour–and your bread will be a doorstop.
The yeast: But yeast in bulk, and freeze for longer storage, but then it’ll need the right environment to come out of its dormant state. Like us, the living organisms need warmth, moisture and food. During the fermentation process, yeast eat the added sugar and also convert the starch in flour into sugar. Then they give carbon dioxide–to cause the dough to rise when it gets trapped in the gluten web, along with organic acids and alcohol–which give the bread flavor. “All you have to do is give the yeast proper conditions and you’re set,” Bonnie said.
What about the other ingredients? What’s their role? Butter (or oil) is the fat that makes for a longer shelf life. Unlike baguettes–which have no fat and harden overnight–sandwich loaves have a little fat in them. Salt is a flavor carrier. Without salt, your bread will taste flat. It also gives the yeast a stopping point so that it doesn’t eat all the sugar. Nonfat dry milk adds a nice dimension to the bread–upping the nutritional protein and promoting a slightly higher rise. Sugar or honey feed the yeast and sweeten up the bread. (An easier way to measure honey is to go by weight–simply tare your scale and squeeze it in. You use fewer dishes and don’t have to scrape the honey out of a measuring spoon.)
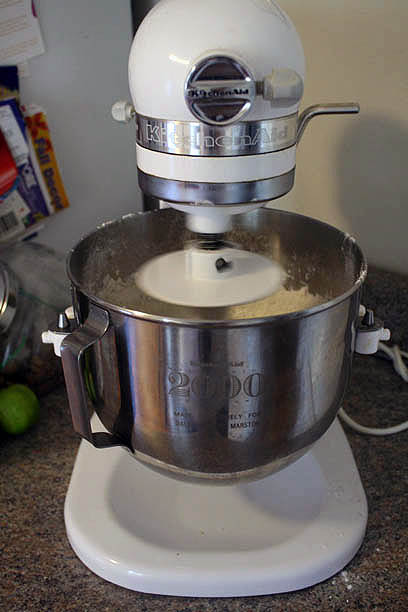
Kneading: This develops gluten, an elastic network of protein strands. You want them to be tight so they’ll trap carbon dioxide and force the dough to rise. Bonnie’s advice (after “degasing” the dough to redistribute yeast and oxygen) is to flatten your risen dough into a rectangle, fold the far end in half towards you, use the heel of your hands to roll it away and close the seam, and then give it a quarter turn. If you use a stand mixer, she recommends finishing the dough by hand to avoid overworking it.

The rise: Skip the towel or plastic wrap. Cover the bowl of dough that’s rising with a shower cap you swiped from a hotel. Place the bowl on the counter top (or dog safe spot!), not on top of the dryer or refrigerator. If your house is cooler than average, your dough will just need a little longer to fully rise. You’ll know it’s ready when you gently press your finger into the top and the indentation remains.

And the closing advice from King Arthur Flour? (Aside from the fact that a Danish dough whisk isn’t just good for mixing dough–try it for blowing bubbles!)
“Make lots of bread–and share it.”
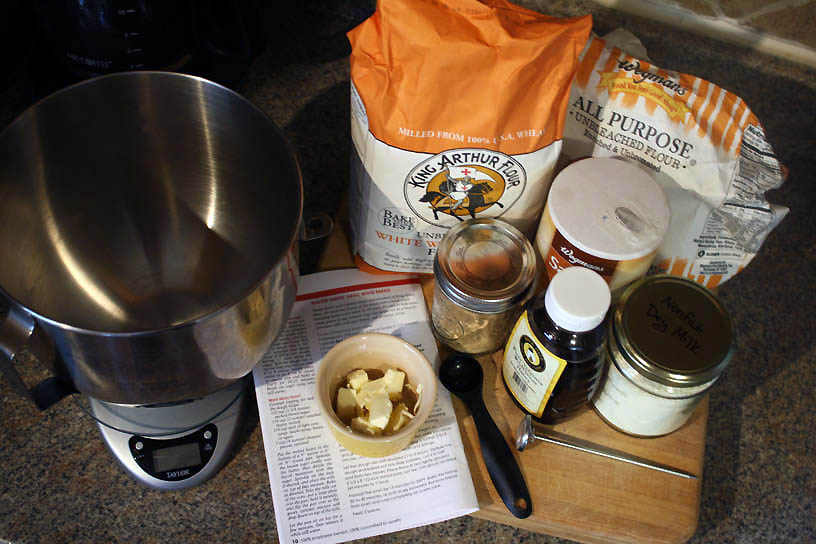
Walter Sands’ Basic White (or Whole Wheat) Bread
Walter Sands was a former owner and president of King Arthur Flour. He made two loaves of this bread with a hand crank kneading bucket every week for 30 years. It’s easy to hide some whole grains in this versatile loaf; this recipe can be a base for cinnamon rolls, pull apart bread, and of course, pizza. Also try it with cinnamon-raisin bread. Yields two loaves.
- 2 cups (16 ounces) warm water
- 2 tablespoons sugar (7/8 ounce) or honey (1½ ounces)
- 2½ teaspoons active dry yeast
- 2 teaspoons salt
- 2 tablespoons (1 ounce) butter, softened, or vegetable oil (7⁄8 ounce)
- 5½ to 6 cups flour (25½ ounces) – use 3 cups (123⁄4 oz.) King Arthur Unbleached White Whole Wheat Flour and the rest all-purpose flour (hold on to ~2 oz. at first)
- ½ cup (2 ounces) dry milk powder (optional)
*If using some whole grain flour, mix it with the warm water, sugar, yeast, butter and salt, cover with plastic and set aside to rest for about 15 minutes or up to 1 hour. This method will soften the bran and liven up the yeast. After the rest, add the remaining all-purpose flour less ½ cup and follow the remaining steps.
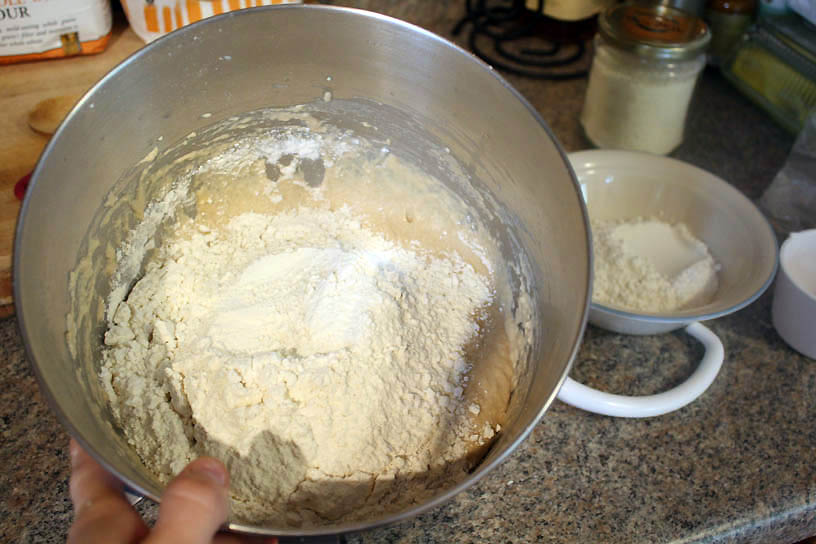
Pour the warm water into a mixing bowl, add the sugar or honey, stir until it dissolves and then add the yeast. When the yeast is bubbling, add the butter and 3 cups of flour, and the salt. (This is where you let the whole wheat sponge rest). Mix together and then stir in 2½ more cups and the dry milk, if using. Sprinkle a portion of the remaining ½ cup on the surface you intend to use for kneading.
Knead the dough for 3 to 4 minutes, until it begins to behave as if it all belonged together. Let it rest while you clean and grease the bowl. Continue kneading a further 3 to 4 minutes, until the dough feels smooth and springy.
Let the dough rise until doubled (1 to 2 hours). (If using whole wheat, the dough won’t completely double.) Deflate the dough and knead out any stray bubbles, cut it in half and form two loaves. Place them in two lightly greased 8½ x 4½ pan-inch bread pans. Let rise until almost doubled (45 minutes to 1 hour).
Preheat the oven for 15 minutes to 350 degrees F. Bake the loaves 35 to 40 minutes, or until nicely browned. Remove bread from oven and cool completely on a wire rack.

Katie this is a beautiful post! So informative. I love all of the tips from KA as well as all of your step-by-step photos. I have never seen that head-and-shoulders shaping method. Amazing! I need to try this soon. Did you use the dry milk? Wondering if I should pick some up.
Thank you!! And I did use just nonfat dry milk–not their brand though they said the makeup was slightly different. But store brand seemed to work just fine!
This is an excellent post. How fortunate that you were able to attend the class. I would love to go to one of their bread-making classes. I appreciate the information and beautiful photographs that you shared and will refer back to this post the next time I make a loaf of bread.
Thank you so much, Allison! It was a fun demo, and I’d love to take a real class in Vermont. Good luck with your bread!